How to Upload a Custom World to Your Minecraft Server
Learn how to upload and configure your own custom Minecraft world map on your MCServerHost server.
Learn how to upload and configure your own custom Minecraft world map on your MCServerHost server.
Whether you built an epic survival base in single player or downloaded a custom adventure map online, uploading a custom world lets you bring it straight to your multiplayer server. This guide will show you how to upload your world folder, update your server settings, and get it running on your MCServerHost server.
Prepare Your World Folder
Before uploading, make sure your world files are structured correctly.
- Locate your world folder on your computer (it should contain files like
level.dat,region/,playerdata/, etc.).
Upload Your World via SFTP
Download an SFTP client such as FileZilla or WinSCP.
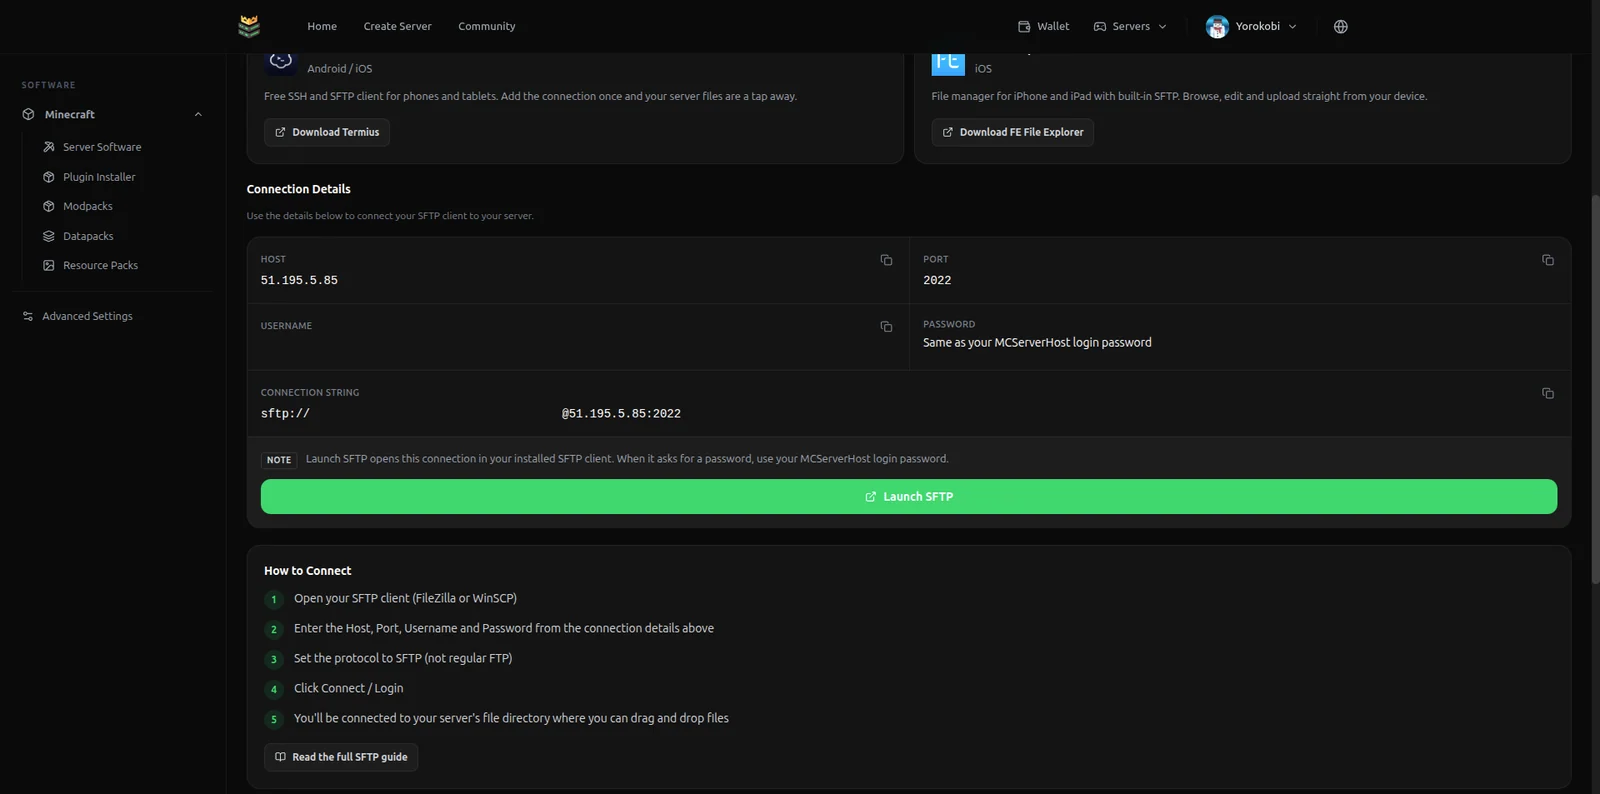
Log into your MCServerHost dashboard, select your Minecraft server, go into your file manager and click on SFTP to see your connection details.
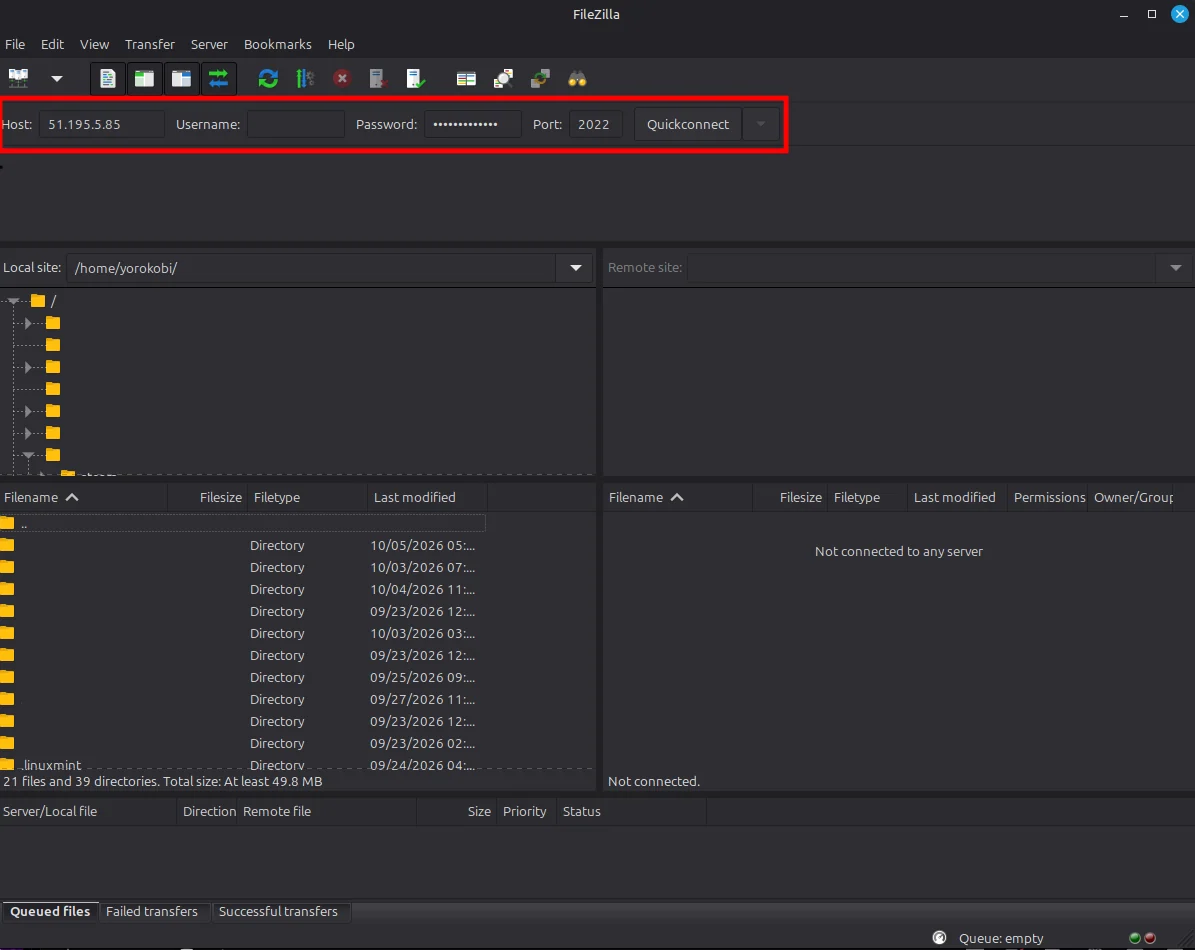
Open your SFTP client and connect using the provided hostname, username, password, and port.
Navigate to your server's root directory in your SFTP client and upload the world folder by dragging and dropping it into the directory.
For a more detailed guide on using SFTP, please refer to our How to Use SFTP with MCServerHost guide.
Update server.properties
To tell your server to load your new custom map instead of the default world folder, you need to change the level name in your configuration.
- Open the
server.propertiesfile in your File Manager.
- Find the line that specifies your world name:

- Change world to the exact name of your newly uploaded world folder for example,
level-name=my epic world
- Press
CTRL + Sto save your changes.
Restart the Server
To apply the changes and force the server to generate or load the new map:
- On the top left click "Start" or "Restart".

Verify Your World
Once the server boots up:
- Join your server using your server IP.
- Explore around to confirm that your custom map loaded successfully.
You've reached the end of this tutorial! By now, your custom world should be fully active and ready for your players to explore.
Similarly, if you are having any type of issue or problem with your server at MCServerHost you can always get in touch with us by joining our Discord server or writing us at support@MCServerHost.com.
Related guides
- How to Ban, Kick and Mute Players on Your Minecraft Server: How to Ban, Kick and Mute Players on Your Minecraft Server at MCServerHost
- Resetting The End in Minecraft: Learn how to safely reset The End dimension without affecting the Overworld.
- How to Set Up ServerLinksZ on Your Minecraft Server: Fill the Server Links pause-menu section with your Discord, Website, Store, and Rules.
- How to Set Up InventoryRollbackPlus on Your Minecraft Server: Auto-back up player inventories so staff can restore items lost to lag, deaths, or griefing.