How to Set Up a Velocity
Run multiple Minecraft servers behind one address with Velocity and send players to the right backend automatically.
Run multiple Minecraft servers behind one address with Velocity and send players to the right backend automatically.
Velocity is a modern proxy server that lets you connect multiple Minecraft servers under one address. Players join a hub, then get sent to survival, minigames, or any other backend you configure. It's faster and more stable than BungeeCord, and most networks use it today.
What You'll Need
- At least two servers on MCServerHost: one for the Velocity proxy, one for each backend
- All backend servers running Paper (or another Velocity-compatible software)
Step 1: Create a Velocity Server
- Go to your MCServerHost dashboard and create a new server.
- When selecting server software, choose Velocity.
- Start the server once to let it generate its config files, then stop it.
Step 2: Configure velocity.toml
- Open Network and copy the port number of your Velocity server.
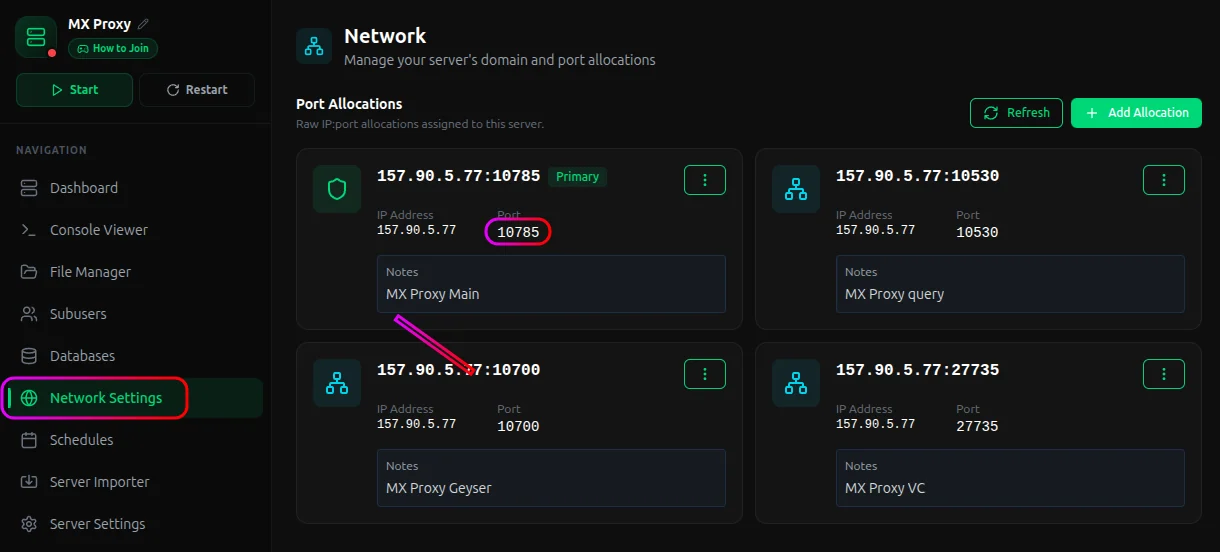
- Open the File Manager on your Velocity server and edit
velocity.toml. The key sections:
Set your bind address:
bind = "0.0.0.0:10785"
Add your backend servers:
[servers]
lobby = "191.96.231.4:10418"
survival = "191.96.231.7:10501"

try = ["lobby"]
Each entry under [servers] is a name mapped to the internal address and port of a backend server. The try list is where players are sent when they first connect.
Set your forwarding mode:
player-info-forwarding-mode = "modern"
Modern forwarding is Velocity's own secure method and is recommended over legacy BungeeCord forwarding. Copy the secret key it generates. You'll need it on the backend servers.
Step 3: Configure Each Backend Server
On each Paper backend server, open config/paper-global.yml and enable Velocity forwarding:
proxies:
  velocity:
    enabled: true
    online-mode: true
    secret: "paste-your-secret-here"
The secret is in forwarding.secret in your Velocity server's file directory. Paste the same value on every backend.
Also open server.properties on each backend and set:
online-mode=false
This tells each backend to let Velocity handle authentication instead of verifying players itself.
Step 4: Start Everything
- Start all your backend servers first.
- Start the Velocity proxy last.
- Connect to your proxy's address in Minecraft. You should land on the lobby server.
To move around between servers from within the game, use /server [name] (op only by default).
Common Mistakes
- Plugins go on the backend, not the proxy. Most plugins (EssentialsX, LuckPerms, and others) run on backend servers. Only proxy-specific plugins like permission bridges or cross-server chat go on Velocity.
- Each backend needs its own port. Make sure no two servers share the same port number in your
velocity.toml. - FlectonePulse and other cross-server plugins need to be installed on both the proxy and each backend with
proxy: trueset in their config to broadcast messages network-wide.
Players only need your proxy's address from here on out. To add more backends later, just register them in velocity.toml and paste in the proxy secret.
If something breaks on MCServerHost, join our Discord server or email support@mcserverhost.com.
Related guides
- How to Set Up Maintenance Mode on Your Minecraft Server: Keep players out with a clean maintenance screen while you work, without shutting down.
- How to Fix High Ping on a Minecraft Server: Learn how to diagnose and troubleshoot high ping on your Minecraft server.
- How to Set Up RCON on Your Minecraft Server: How to Set Up RCON on Your Minecraft Server at MCServerHost
- How to Set Up a Custom Domain for Your Minecraft Server: Set a custom domain so players can join with a cleaner server address.