How to Set Up a Custom Domain for Your Minecraft Server
Set a custom domain so players can join with a cleaner server address.
Set a custom domain so players can join with a cleaner server address.
Your default server address looks something like craftforces820.mcsh.io. That works fine, but if you own a domain and want players to connect via play.yourserver.com instead, you can get it done in a few minutes.
What you need
- A domain you own with DNS access (You can get it from providers like Spaceship, NameCheap, etc.)
- Your MCServerHost server
Step 1: Get your CNAME target
- Log in to your MCServerHost dashboard and open your server.
- Go to Server Settings and find the Custom Domain section.
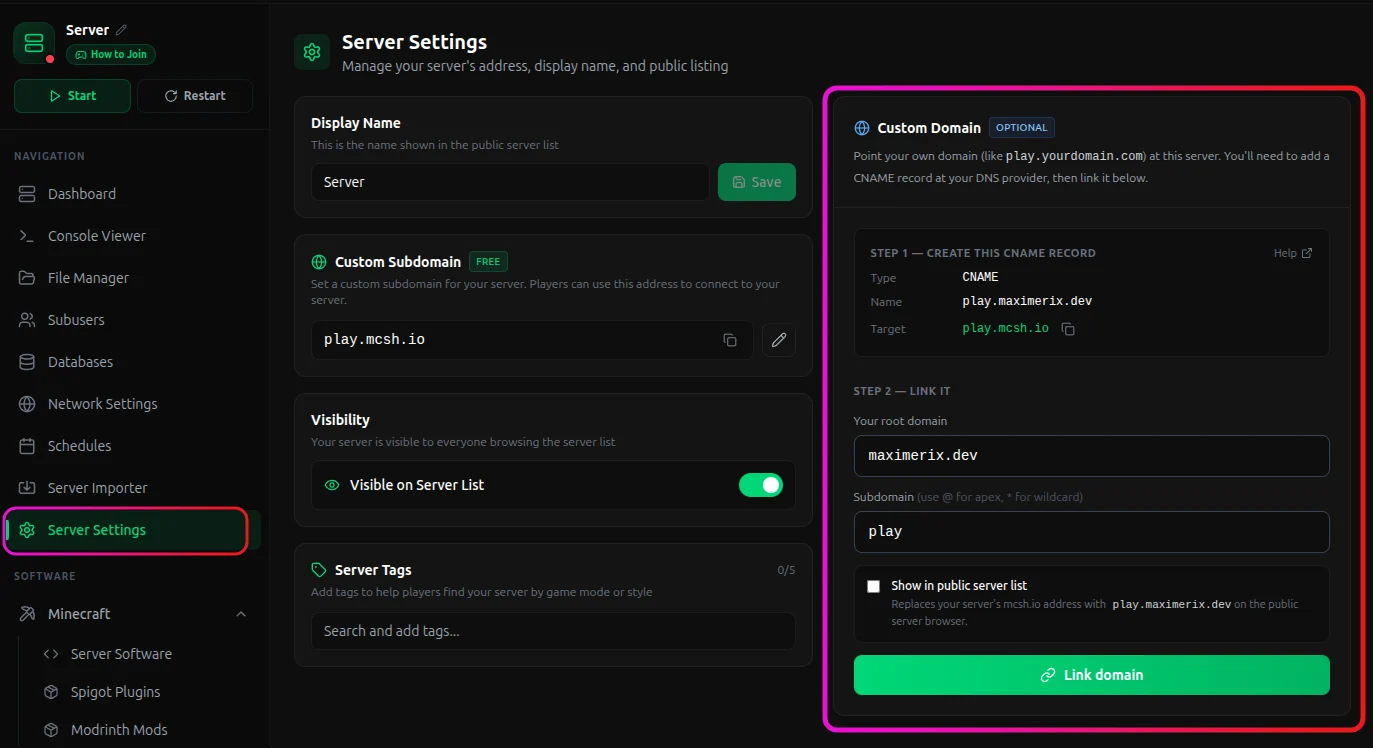
- Under Step 1: Create This CNAME Record, you'll see the CNAME target, something like
play.mcsh.io. Keep this page open.
Step 2: Add the CNAME record at your DNS provider
Go to your registrar or DNS provider (Cloudflare, Namecheap, GoDaddy, etc.) and create a new DNS record:
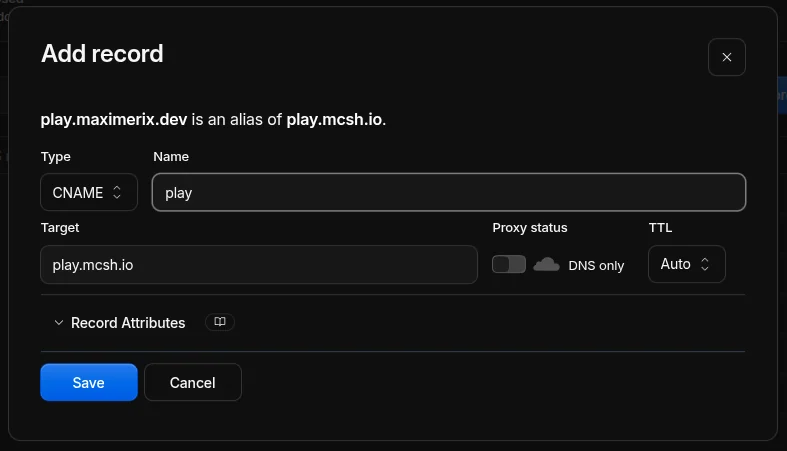
If you're on Cloudflare, make sure the record is not proxied. The cloud icon should be gray, not orange.
Save the record, then head back to your MCServerHost panel.
Step 3: Link the domain
Back in the Custom Domain section:
- Fill in the fields to match what you configured in DNS.
- If you want your custom domain to show up in the MCServerHost public server browser instead of your
mcsh.ioaddress, check Show in public server list. - Click Link domain.
DNS propagation
Changes can take anywhere from a few minutes to an hour. Most providers apply them within 5 minutes though. Once it's live, players can connect using your custom domain directly in Minecraft.
If you run into any issues, join our Discord server or email us at support@mcserverhost.com.
Related guides
- How to Set Up Maintenance Mode on Your Minecraft Server: Keep players out with a clean maintenance screen while you work, without shutting down.
- How to Fix High Ping on a Minecraft Server: Learn how to diagnose and troubleshoot high ping on your Minecraft server.
- How to Set Up RCON on Your Minecraft Server: How to Set Up RCON on Your Minecraft Server at MCServerHost
- How to Set Up a Velocity: Run multiple Minecraft servers behind one address with Velocity and send players to the right backend automatically.