How to Write a Guide That Gets Approved
Learn what staff look for in a guide and how to fill in each field so yours is approved.
Learn what staff look for in a guide and how to fill in each field so yours is approved.
Anyone with an MCServerHost account can write a guide. Staff read every guide before it goes live, and they approve guides that work, cover every step and are easy to follow. This guide goes through each part of the editor and lists what staff check, so your guide can be approved the first time you submit it.
Before you start
- Sign in to your MCServerHost account. The Write a guide button only appears when you are signed in.
- Search the guides for your topic. If a guide already covers it, write about something that guide leaves out, or add your tip as a comment on it.
- Test every step on a server before you write it down. A free server is enough for most topics.
Open the editor
- Go to Community, then Guides.
- Click Write a guide.

The editor has two parts. In the main part, you write the title, the summary and the guide itself. In the panels beside it, or below it on a phone, you choose the category, difficulty, tags and cover image. The editor keeps a copy of your work while the tab is open, so reloading the page does not lose it. Only Save draft stores the guide on your account.
Write a clear title
Readers see the title first, in the guide list and in search results.
- Say what the reader will be able to do. "How to Set Up Ranks with LuckPerms" tells readers more than "LuckPerms".
- Use title case, like the other guides: start each main word with a capital letter.
- Spell plugin, mod and software names the way their authors do, such as EssentialsX, LuckPerms and GeyserMC.
- Keep it short enough to read at a glance. The editor allows up to 200 characters, but most good titles are under 60.
The address of your guide comes from its title. "How to Set Up Ranks with LuckPerms" becomes /community/guides/how-to-set-up-ranks-with-luckperms.
Write the description
The Summary field is your guide's description. It appears under the title on the guide's card, at the top of the guide and in search results.
- Write one sentence that says what the reader gets from the guide.
- Do not repeat the title. The guide page hides a summary that only repeats the title.
- Aim for about 100 characters. Cards show two lines of the summary and cut off the rest.
| Weak summary | Strong summary |
|---|---|
| How to Set Up EssentialsX on Your Minecraft Server | Set up homes, warps, kits and a spawn point with the most popular utility plugin. |
| A guide about backups. | Schedule automatic backups so a bad update never costs you your world. |
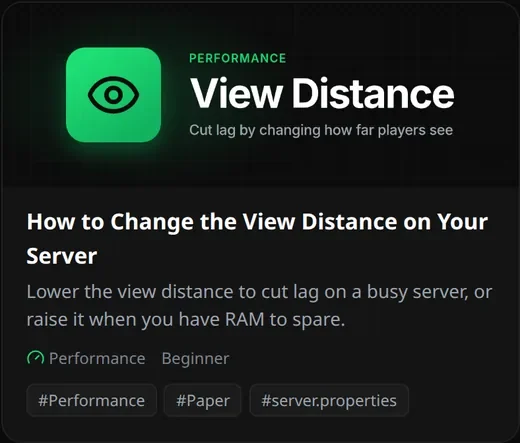
This is how the title, summary, category, difficulty and first three tags look on a card:
Choose the category and difficulty
Readers filter the guide list by category, so pick the one that fits what your reader wants to do.
| Category | Use it for |
|---|---|
| Getting started | First steps on MCServerHost: accounts, creating and joining a server, files and basic settings |
| Gameplay | Worlds, game rules and plugins that change how the game plays |
| Mods | Mods, modpacks and plugins that add new content |
| Performance | Lag, RAM, TPS and finding what slows a server down |
| Networking | Domains, ports, proxies such as Velocity, and ping |
| Billing | Plans, payments and subscriptions |
| Other | Anything that fits none of the categories above |
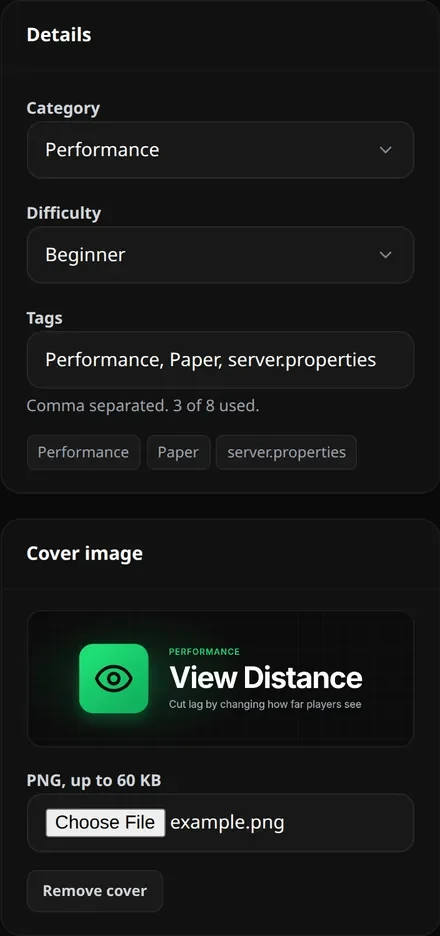
Then set the Difficulty:
- Beginner: the reader needs no experience, and the steps use the panel or simple commands.
- Intermediate: the reader edits config files or installs and sets up plugins or mods.
- Advanced: the reader works with proxies, databases, several servers or scripts.
Add tags
Tags group guides on the same topic. Readers can click a tag on a card to see every guide that has it.
- Type your tags in the Tags field, separated by commas. You can add up to 8.
- Put the most important tag first. Cards show only the first three.
- Use the words readers search for: the plugin or mod, the server software (such as Paper or Fabric) and the topic (such as Permissions or Backups).
- Reuse the tags other guides already have, spelled the same way. Tags are case-sensitive, so
Paperandpaperare two different tags. - A tag starts with a letter or a number and is up to 32 characters long. It can contain letters, numbers, spaces and the characters
_ . / + -.
Add a cover image
Every guide needs a cover. A guide without one shows an empty box in the guide list.
- Make it wide, about three times as wide as it is tall, such as 1200 × 400 pixels.
- Keep the title and any logo in the middle. The guide list and the guide page trim the edges to fit.
- A short title with the logo of the plugin or mod works well. Only use images you made or have permission to use.
- Use a PNG, JPEG, WebP or GIF file of up to 10 MB. The site makes a smaller copy for each screen, so you do not need to shrink the file first.
Under Cover image, click Add a cover. Choose Upload to pick a file from your computer, Link to copy an image from another site, or Your images to use one you added before, then click Add image. You can also drag a file onto the cover box. The editor shows the cover once it is saved. Replace cover changes it, and Remove cover takes it off.
Format the guide
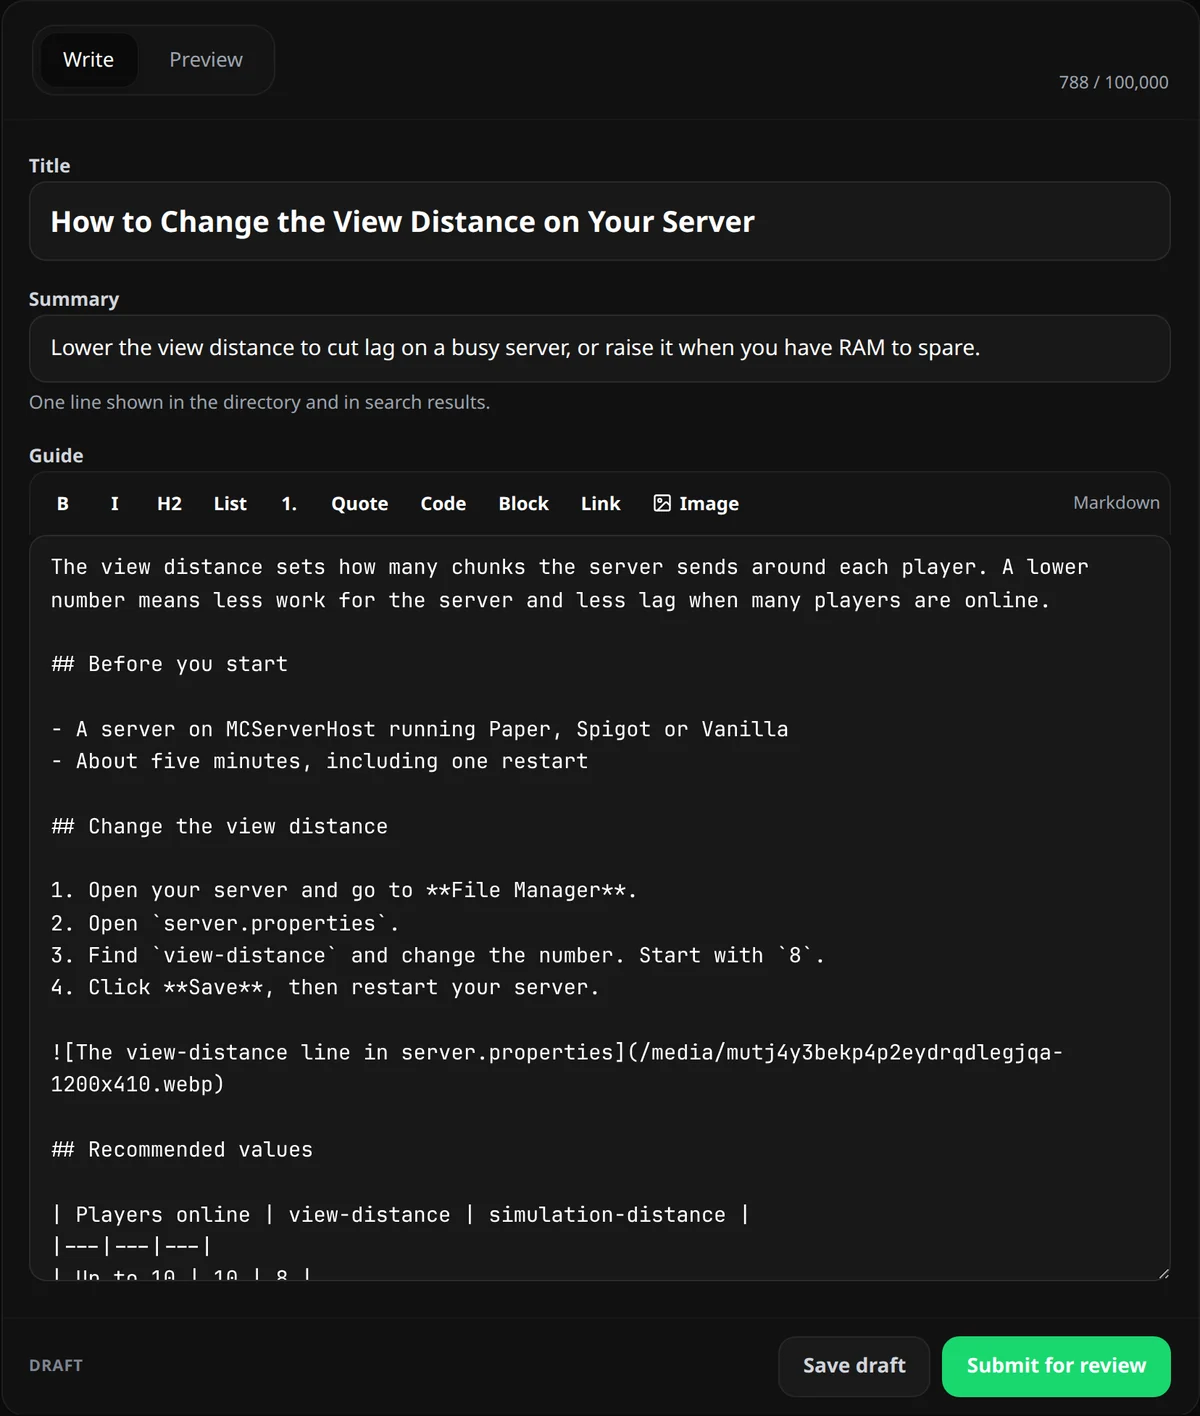
Write the guide in the Guide box, in Markdown. The buttons above the box add the most common formatting for you.
| To get | Type |
|---|---|
| A section heading | ## Install the plugin |
| A smaller heading | ### Step 1: Download the file |
| Bold text | **File Manager** |
| Italic text | *optional* |
| A numbered list | 1. Open the File Manager. |
| A bulleted list | - Paper or Purpur |
| A link | [Paper downloads](https://papermc.io/downloads) |
| An image | Click Image, described under Add screenshots |
| Code inside a sentence | `server.properties` |
| A note | > Tested on Paper 1.21.4. |
For a block of code or a config file, put three backticks on the line above it and on the line below it:
```yaml
view-distance: 8
```
For a table, put a pipe between the cells and a row of dashes under the first row:
| Setting | Value |
|---|---|
| view-distance | 8 |
Follow these rules and your guide will read like the rest of the library:
- Start with one or two sentences that say what the guide does and who it is for. The page already shows your title, so do not repeat it as a heading.
- Use
##for each main section and###for the steps inside one. Every heading is listed under On this page on the guide, so name each one after what its section does. A single#heading becomes a##. - Number steps that happen in order, and use bullets when the order does not matter. Put one action in each step.
- Put the exact names of buttons, tabs and fields in bold, as they appear on screen, such as File Manager or Save.
- Put commands, file names, folder names and settings in code, such as
/lp editor,server.propertiesand thepluginsfolder. - Put config files and console output in a code block.
- Do not use HTML. Tags such as
<br>show up as plain text. - Start every link with
https://, or with/for a page on this site. Other links, such asmailto:links, show up as plain text.
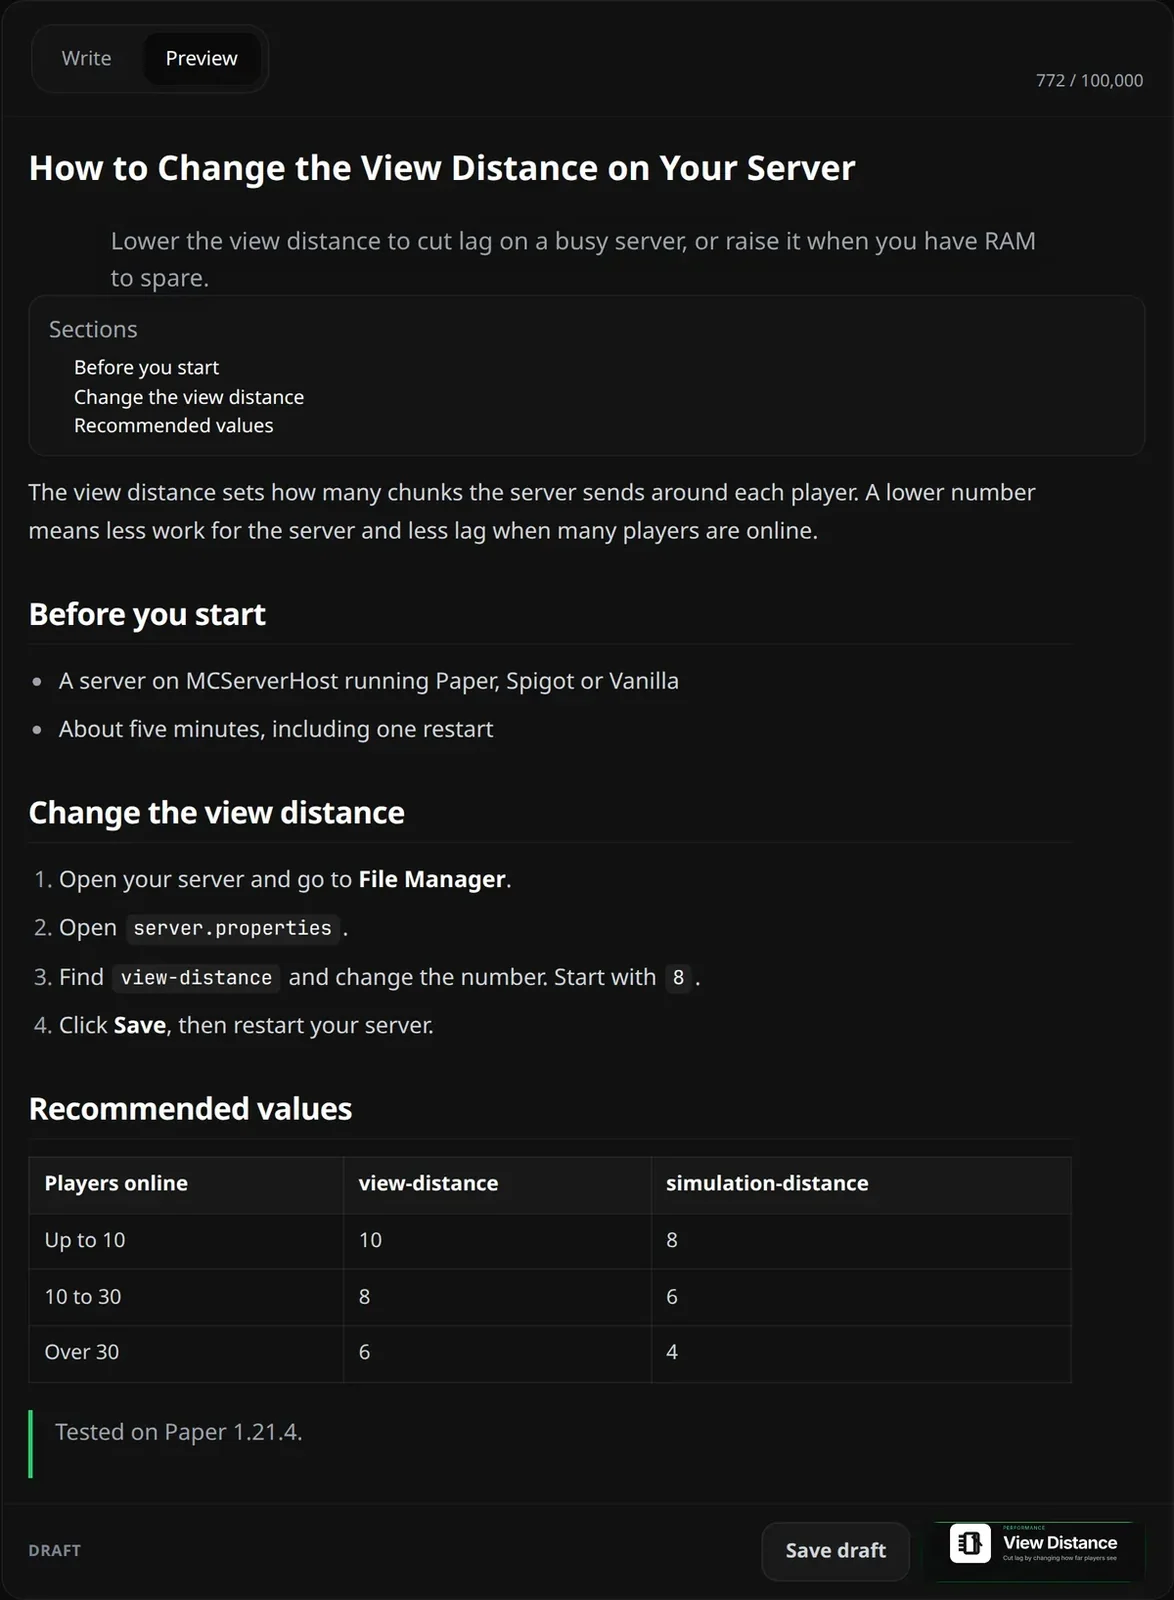
Before you submit, open the Preview tab. It shows the guide the way readers will see it, with its list of sections.
Add screenshots
A screenshot shows the reader where to click. Add one for each step where the reader has to find a button, a tab or a setting.
- In the Guide box, click the empty line where the image should go.
- Click Image above the box. Add an image opens.
- Choose where the image comes from:
- Upload: drop a file on the box, or click Choose a file.
- Link: paste the address of an image on another site into Image link. The site keeps its own copy, so the image still works if the other site deletes it.
- Your images: pick an image you added before.
- Type what the image shows under Description, then click Add image.
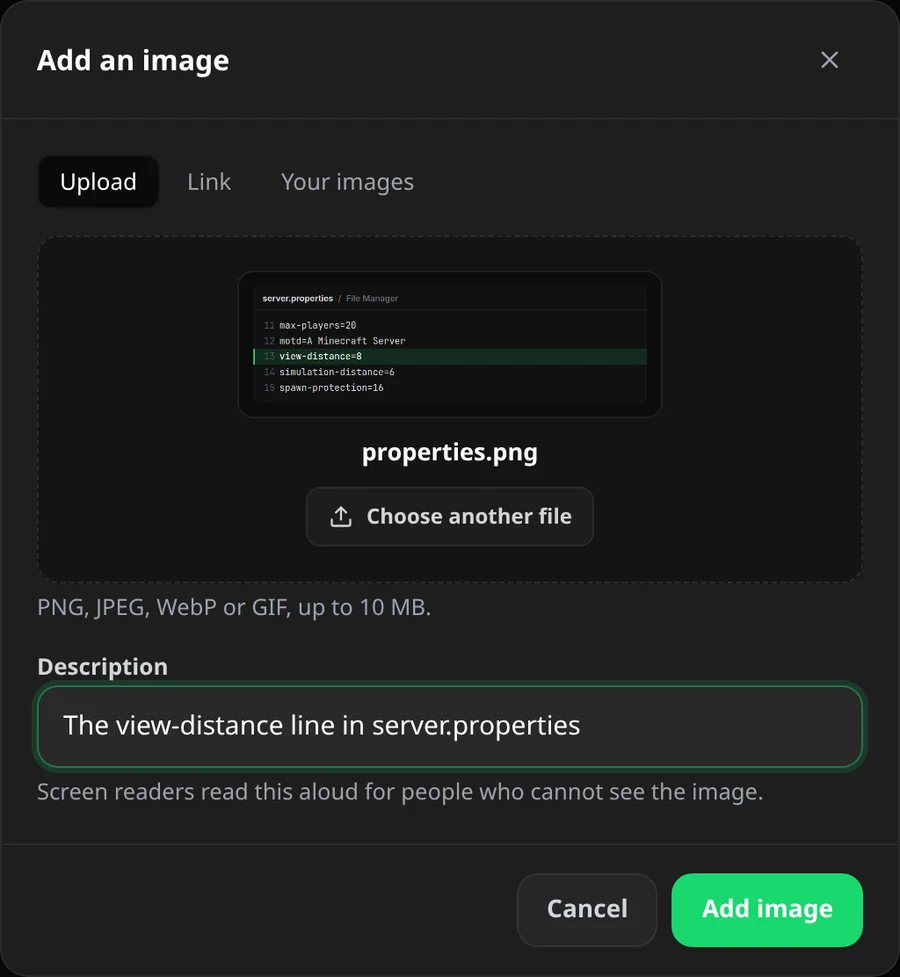
The editor adds a line such as . Keep the part in round brackets as it is. It is where your image lives on MCServerHost.
You can also paste a screenshot straight into the Guide box, or drag image files onto it. Each one shows as ![Uploading image…]() until it has uploaded. Then type a description between its square brackets. If you type an image link yourself, such as , the site copies that image when your guide goes live.
- The site takes PNG, JPEG, WebP and GIF files of up to 10 MB. It shrinks large images, and removes the camera and location details that phones store in photos.
- Crop each screenshot to the part that matters.
- Hide anything private before you add it: email addresses, IP addresses, passwords, and your SFTP or RCON details.
- Describe every image. Screen readers read the description aloud, and it appears when the image cannot load.
- Upload screenshots from Discord as files. Discord image links stop working after a while, and the site cannot copy an image from a link that no longer works.
Write so anyone can follow it
- Write for someone who has never done this before. Explain a word they might not know the first time you use it.
- Keep your sentences short, with one step in each.
- Say what the reader should see after a step, such as "The console shows
Donewhen the server has started." - Use placeholders such as
play.example.comfor addresses and names, and say what to replace them with. - Say which versions you tested, such as "Tested on Paper 1.21.4 with LuckPerms 5.4". Readers and staff can then tell when a guide needs an update.
- Link to the official download page or documentation instead of copying it.
- Write the guide yourself. Staff send back guides copied from other sites or guides.
- If an AI tool helped you write, test every step yourself. Staff send back guides with steps that do not work.
- Check your spelling and grammar. Your browser's spell check finds most mistakes, and a free tool such as LanguageTool finds more.
Check the search settings
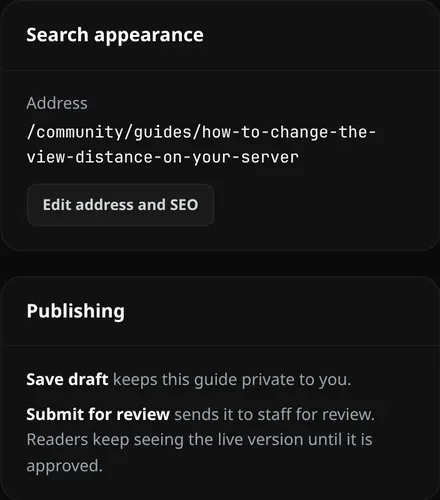
Under Search appearance, Address shows where your guide will live. Click Edit address and SEO to change these:
- URL slug is the last part of the address. Leave it blank to follow the title.
- SEO title and SEO description are what search engines show. Leave them blank to use your title and summary. The site adds "Guides | MCServerHost" after the title, so do not add the site's name yourself.
Submit your guide
- Save draft keeps the guide private to you. Save as often as you like.
- Submit for review sends it to staff. Readers see nothing until staff approve it.
To follow your guides, click My articles on the guides page. Its filters show what is Live, what is Waiting on staff, your Drafts and what was Sent back.
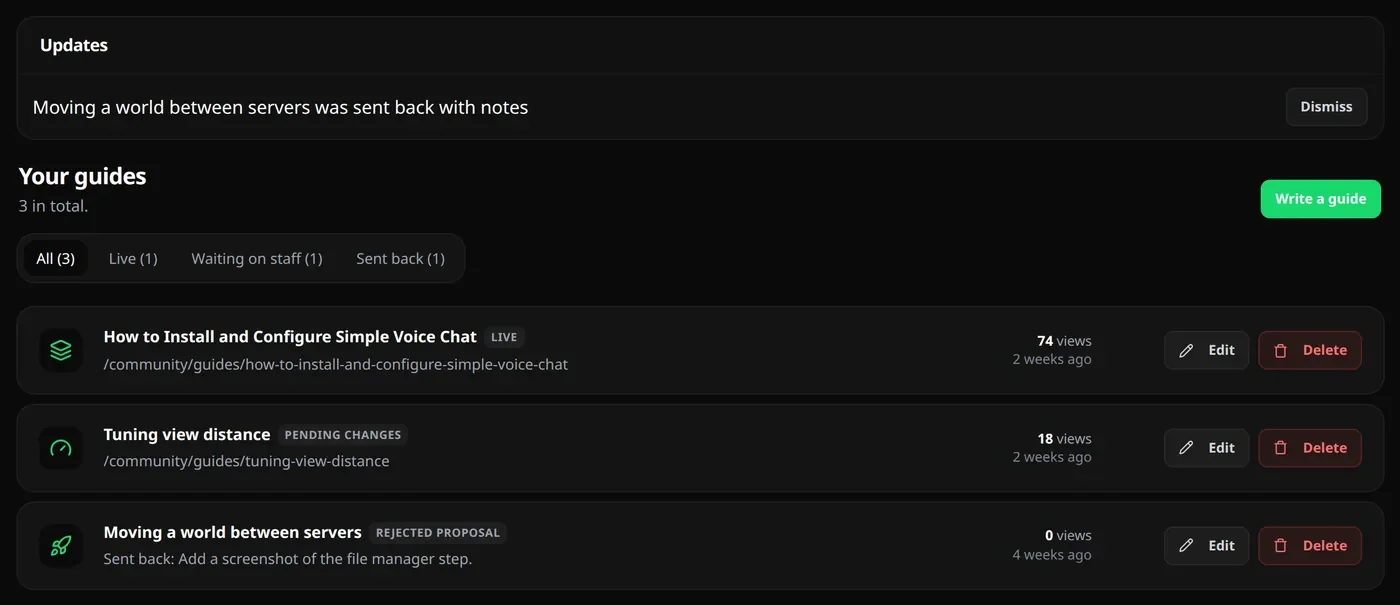
When staff send a guide back, Updates tells you, and the reason appears under the guide's title. Fix what the reason names, click Edit and submit the guide again.
You can keep improving a guide after it goes live. Your changes go to staff as a proposal, and readers keep seeing the live version until staff approve them. Use Change note to tell staff what you changed and why.
Readers can vote on whether your guide helped them, leave comments and report problems. Check your guide from time to time, and update it when something changes.
What gets a guide sent back
Staff send a guide back when:
- A step does not work, or a step is missing.
- It describes buttons, pages or versions that have changed.
- It has no cover, category, difficulty or tags, or its summary repeats the title.
- It is one long block of text with no headings or lists.
- A screenshot shows private details.
- It is copied from another guide or website.
- It advertises a server, a host, a shop or a referral link.
- An existing guide already covers the topic, and the new guide adds nothing to it.
Checklist before you submit
- The title says what the reader can do, in title case.
- The summary is one sentence and does not repeat the title.
- You chose a category and a difficulty.
- You added 3 to 5 tags, spelled like the tags other guides use.
- The guide has a wide cover, with the title and any logo in the middle.
- The guide starts with a short introduction and uses
##headings. - Steps are numbered and name buttons and fields in bold.
- Every screenshot was added with Image, has a description and shows nothing private.
- You tested every step and said which versions you used.
- You read the guide in the Preview tab and fixed any mistakes.
If you have a question about writing a guide, ask it on the Questions board.
Related guides
- How to Use Color Codes on Your Minecraft Server: Add colors and formatting to chat, signs, and messages
- How to Download Your Minecraft World from Your Server: Download your Minecraft world files safely and keep a backup or move them to another server.
- How to Migrate your old MCServerHost account.: How to Migrate your old MCServerHost account to the new MCServerHost.
- How to Ban, Kick and Mute Players on Your Minecraft Server: How to Ban, Kick and Mute Players on Your Minecraft Server at MCServerHost